Difference between revisions of "Intro to 3D Modeling with Tinkercad.com"
(→Lesson: Name Badge for the Maker Station) |
(→Lesson: Maker Keychain) |
||
| Line 22: | Line 22: | ||
== Lesson: Maker Keychain == | == Lesson: Maker Keychain == | ||
This intro lesson will getting you up and running quickly with tinkercad. In this lesson you will learn how to use the base shapes called ''primitives'' to make a simple keychain design. You will also learn how to add features by ''removing'' shapes using holes. In this example, we convert a shape to a ''hole'' to add the keyring hole feature to the keychain. Lastly you will be able to download your design for 3D printing and a keychain is a great 1st part for printing since it has a flat bottom and will print relatively quickly. | This intro lesson will getting you up and running quickly with tinkercad. In this lesson you will learn how to use the base shapes called ''primitives'' to make a simple keychain design. You will also learn how to add features by ''removing'' shapes using holes. In this example, we convert a shape to a ''hole'' to add the keyring hole feature to the keychain. Lastly you will be able to download your design for 3D printing and a keychain is a great 1st part for printing since it has a flat bottom and will print relatively quickly. | ||
| + | <br/> Class handout: [[Tinkercad class.pdf]] | ||
Revision as of 09:55, 23 September 2015
Contents
General Info
TinkerCAD.com is a browser based CAD/Drafting tool for creating 3D models suitable for 3D printing or importing into graphics engines in other programs like minecraft or animation programs.
- TinkerCAD uses modern browsers, so nothing needs to be installed on a user's computer. Everything runs in the cloud.
- TinkerCAD is super easy to learn and a great way to develop beginner CAD skills and 3D thinking.
- TinkerCAD is FREE, simply create an account and follow the intro lessons. http://www.tinkercad.com
Maker Station member Tanju Bayramoglu is a fan of tinkerCAD and has offered to host a class on it.
Feel free to reach out to him or the Board of Directors (info@themakerstation.com) to ask questions or request another class.
TinkerCAD's intro video https://youtu.be/MwjWT-EvKSU
Lesson: Maker Keychain
This intro lesson will getting you up and running quickly with tinkercad. In this lesson you will learn how to use the base shapes called primitives to make a simple keychain design. You will also learn how to add features by removing shapes using holes. In this example, we convert a shape to a hole to add the keyring hole feature to the keychain. Lastly you will be able to download your design for 3D printing and a keychain is a great 1st part for printing since it has a flat bottom and will print relatively quickly.
Class handout: Tinkercad class.pdf
1.) Login/Create Account
- In a new browser window, go to http://www.tinkercad.com and choose SIGN IN or SIGN UP as needed.
- Enter your credentials.
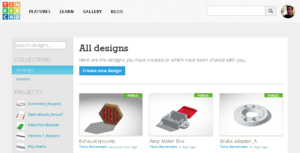
- The page will load with your dashboard. If you are an existing member, your existing designs will be displayed. Otherwise, you will see a generally blank screen.
2.) Create new design
- Click the Create new design button
- The page will refresh and the Tinkercad workspace will be displayed
- Scroll down until the geometric shapes are displayed in the tool pane on the right side of the screen
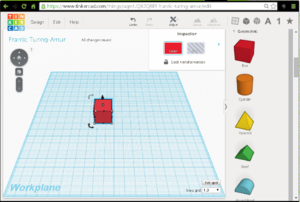
- Click the red box and drag it on to the workplane
3.) Edit shapes
- Click on the red box to reveal the shape handles.
- Select a corner handle and drag it to convert the square box into a rectangular box 40 mm long.
- Select the top center handle down to reduce the box height to 2 mm tall.
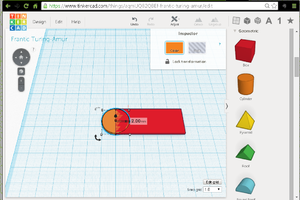
- In the tool pane, scroll to find the cylinder and drag it on to the workplane near the box.
- Select the top center handle and reduce the cylinder's height to 2 mm tall.
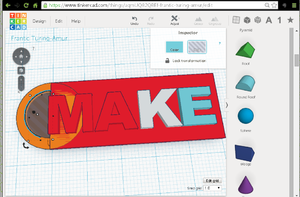
- Select and drag the cylinder so that its center lines up with the left edge of the box as shown in the screenshot.
- Click the +/- button and the panning left/right/up/down arrows to position your view of the workplane as needed.
4.) Add Text
- In the tool pane scroll down for individual letters.
- You may need to expand the Letters section of the tool plane.
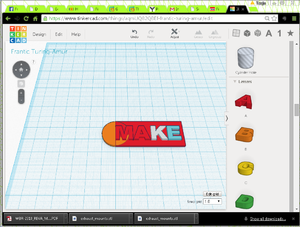
- Select the letters "M" - "A" - "K" - "E" individually and drag them on to the box.
- Position the letters as shown in the screenshot.
- Click the +/- button and the panning left/right/up/down arrows to position your view of the workplane as needed.
5.) Add hole feature for the key ring
- In the tool pane scroll down back up for the Round Roof shape.
- Drag the round roof anywhere on to the workplane.
- Click on the new shape and notice the arc'd rotation arrows.
- Rotate the round roof 90 degrees.
- Rotate it again 90 degrees onto it's side so that it looks like a half circle when viewed from the top (you will end up with a half cylinder shape).
- With the shape on its side, select the up pointing handle and raise it only 4mm so that it remains 1 mm below the workplane (-1 mm above the plane).
- Select the top handle and reduce the height so that it is 4mm tall.
- Select the side handles and drag to resize so that it is 14 mm long and 7 mm wide.
- Drag the half-cylinder on to the previous cylinder and line up the flat side with the letter "M"
- Take care to center the shapes as shown in the screenshot.
- Select only the half-cylinder and then click on the Hole option in the Inspector dialog box.
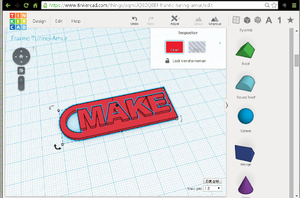
- The design should end up as shown in the screenshot.
6.) Group parts
- Click on the workplane and drag a selection box around all the shapes and letters.
- You may need to zoom out as needed.
- The selected items will have a blue glow indicating selection. If you missed a part, simply drag a new box until all are selected.
- With all the parts selected, click on the Group button found on the top tool bar (looks like a Mountain Icon called Group)
- Grouping the parts will join the Hole shape to the Solid shapes resulting in a cutout for the keyring.
- The design should end up as shown in the screenshot.
7.) Rename Design and Download
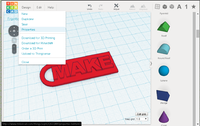
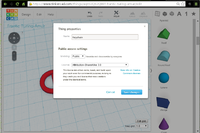
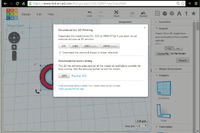
- With your design complete, you are now ready to download it for 3D printing or sharing as needed.
- In the upper toolbar, click on Design and then choose Properties.
- The Properties dialog box will be displayed.
- Rename the file as needed.
- Choose visibility as Public and change License options at your discretion.
- Click Save.
- Next, click on Design again, but this time choose Download.
- The Download dialog box will be displayed.
- Choose an option at your discretion. STL files are the most common file type for 3D printing.
- Save the file to your local hard drive/computer
8.) Next steps/Advanced Designs
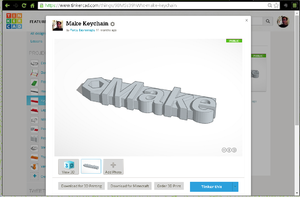
- Using the principles learned in the previous steps, try to make a nicer design similar to the one shown in this screen shot
- Hexagonal prism and a matching hexagonal hole add a nice "maker" touch to the design.
- Small cylinders can be used to round off the corners on the right side of the keychain's rectangles.
- Letters and box shapes can be resized to obtain more interesting edge effects.
- Shape colors can be changed using the Inspector dialog box.
Lesson: Name Badge for the Maker Station
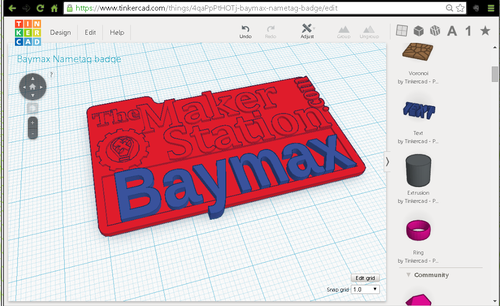
Add your name to the Maker Station's name tag badge
1.) Login/Create Account
- In a new browser window, go to http://www.tinkercad.com and choose SIGN IN or SIGN UP as needed.
- Enter your credentials.
- The page will load with your dashboard. If you are an existing member, your existing designs will be displayed. Otherwise, you will see a generally blank screen.
2.) Copy Existing Badge and "Tinker
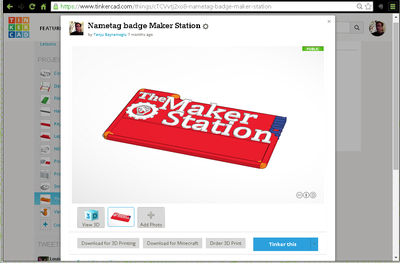
- "Go to this design: https://tinkercad.com/things/cTCVvtj2xo8
- Click on the design.
- Then click on the Copy & Tinker Button
3.) Add Your Name
- Observer all the various shape elements of the existing name badge design, it composed of a series of primitive squares, cylinders, and other shapes that when grouped, render a nice, well rounded design.
- Drag a selection box around all the parts, and group them.
- Using the steps from the previous lesson, add you name to the blank area under the word Station.
- You can add the individual letters from the tool pane
- Or use the Text by Tinkercad from the Shape Generators section of the tool pane
- The Text Shape Generator loads a dialog box allowing you to change the word TEXT to your name
- Explore the other font types available and choose the one you like.
- For this example Arimos font was used
- Drag the shape handles on the text object, to adjust the size of the text and height so that it fits on the badge.
4.) Save & Download
- After you have added your name, you are free to adjust colors or group everything
- Or just leave as-is.
- Rename the design. From the tool bar choose: Design -> Properties -> Rename -> Save.
- Download the design: From the tool bar choose: Design -> Download -> STL.
- Save to a local drive for printing.
- Get your badge printed and wear it to the next Maker Station event.
Lesson: Intermediate Tips & Tricks
- Helper Tools: Workplane and Ruler
- Rotating on different centers
- Duplicating objects
- Aligning and Mirroring
- Fillets, radius, and chamfers
- Importing files
