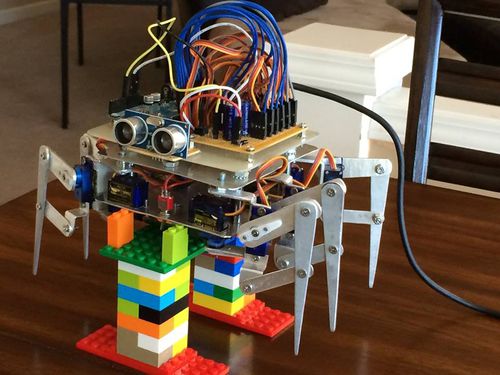
Difference between revisions of "Robotics Hexapod Kit"
(→About the Shield) |
|||
| (21 intermediate revisions by the same user not shown) | |||
| Line 8: | Line 8: | ||
<tr> | <tr> | ||
<td>'''Size''' | <td>'''Size''' | ||
| − | * | + | * 4.5" x 4.0" x 4.0" |
* Weight ~657 grams | * Weight ~657 grams | ||
</td> | </td> | ||
| Line 28: | Line 28: | ||
== BOM - Bill Of Materials == | == BOM - Bill Of Materials == | ||
| + | |||
| + | |||
| + | ===GitHub Repo:=== | ||
| + | https://github.com/TheMakerStation/Crios_hexabot | ||
| + | |||
| + | |||
| + | |||
<table border=1 cellpadding=7 cellspacing=0 > | <table border=1 cellpadding=7 cellspacing=0 > | ||
<tr> | <tr> | ||
| − | < | + | <th >Electronic</th><th >Mechanical</th> |
| + | |||
<tr> | <tr> | ||
<td> | <td> | ||
* Arduino Board | * Arduino Board | ||
| + | * [https://www.amazon.com/dp/B00Q9YB7PI/ref=cm_sw_r_oth_awd_4j6fxbED8BCA1 Arduino Prototype Shield] | ||
* [http://wiki.themakerstation.com/File:Ultrasonic_Sensor.jpg Ultrasonic Sensor qty: 1] | * [http://wiki.themakerstation.com/File:Ultrasonic_Sensor.jpg Ultrasonic Sensor qty: 1] | ||
* IR Remote and Receiver Kit | * IR Remote and Receiver Kit | ||
| Line 48: | Line 57: | ||
<td> | <td> | ||
| − | * Plate Bottom | + | * Plate Bottom 4.5" x 4.0" x .028" |
** Aluminum or plastics options | ** Aluminum or plastics options | ||
* Plate Top LxWxH | * Plate Top LxWxH | ||
** Aluminum or plastics options | ** Aluminum or plastics options | ||
* Leg fabbed from 0.5" x 0.5" x 1/16" aluminum strip | * Leg fabbed from 0.5" x 0.5" x 1/16" aluminum strip | ||
| − | * Link A | + | * Link A 2.0" x 0.5" |
| − | * Link B | + | * Link B 1.75" x 0.5" |
* Servo Brackets - fabbed from 0.5" x 0.5" x 1/16" aluminum angle | * Servo Brackets - fabbed from 0.5" x 0.5" x 1/16" aluminum angle | ||
* Stand offs | * Stand offs | ||
| Line 61: | Line 70: | ||
</table> | </table> | ||
| + | ==Fabrication and Assembly == | ||
| + | === Arduino and Controls === | ||
| + | ====About the Arduino board and code==== | ||
| − | |||
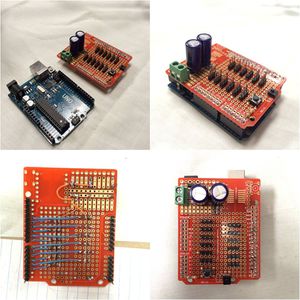
| − | === | + | ==== About the Shield ==== |
| − | + | https://www.amazon.com/dp/B00Q9YB7PI/ref=cm_sw_r_oth_awd_4j6fxbED8BCA1 | |
| + | |||
| + | [[File:Crios shield.jpg | 300 px ]] | ||
| + | |||
| + | ===Top Plate=== | ||
| + | |||
| + | ===Bottom Plate=== | ||
| + | <table border=1 cellpadding=7 cellspacing=0 > | ||
| + | |||
| + | <tr> | ||
| + | <th >Fabricated Option</th><th >3D Printed Option</th> | ||
| + | |||
| + | <tr> | ||
| + | <td> | ||
| + | Download template and print on letter paper | ||
| + | * Cut aluminum plate | ||
| + | </td> | ||
| + | |||
| + | <td> | ||
| + | Download files from repo | ||
| + | Print settings: | ||
| + | * High quality '''Or''' | ||
| + | * 2 top & bottom layers with 3 perimeters with 30% infill | ||
| + | </tr> | ||
| + | </table> | ||
=== Legs === | === Legs === | ||
Info about how to fabricate or 3D print the legs | Info about how to fabricate or 3D print the legs | ||
| + | |||
| + | |||
| + | <table border=1 cellpadding=7 cellspacing=0 > | ||
| + | |||
| + | <tr> | ||
| + | <th >Fabricated Option</th><th >3D Printed Option</th> | ||
| + | |||
| + | <tr> | ||
| + | <td> | ||
| + | [https://github.com/TheMakerStation/Crios_hexabot/tree/master/drawings Download template] and print on letter paper | ||
| + | |||
| + | * Drill holes using drill press | ||
| + | * Cut aluminum plate using saber/jig saw or band saw with metal cutting blades | ||
| + | </td> | ||
| + | |||
| + | <td> | ||
| + | Download files from repo | ||
| + | |||
| + | Print settings: | ||
| + | * High quality '''Or''' | ||
| + | * 2 top & bottom layers with 3 perimeters with 30% infill | ||
| + | </tr> | ||
| + | </table> | ||
=== Mounting Brackets for Servos === | === Mounting Brackets for Servos === | ||
| Line 77: | Line 135: | ||
===General Assembly=== | ===General Assembly=== | ||
| + | |||
| + | ===Lessons Learned === | ||
| + | |||
| + | Servos: the SG90's don't like to operate near their end stops at 0 and 180, so these areas should be avoided for extended periods of operation | ||
Latest revision as of 15:47, 27 April 2016
Contents
General Specs
Link to Kit Development Meeting Notes: 2016_Hexabot_Build_Meeting_Notes
Size
|
Power
|
Controls
|
Sensors
|
BOM - Bill Of Materials
GitHub Repo:
https://github.com/TheMakerStation/Crios_hexabot
| Electronic | Mechanical |
|---|---|
|
|
Fabrication and Assembly
Arduino and Controls
About the Arduino board and code
About the Shield
https://www.amazon.com/dp/B00Q9YB7PI/ref=cm_sw_r_oth_awd_4j6fxbED8BCA1
Top Plate
Bottom Plate
| Fabricated Option | 3D Printed Option |
|---|---|
|
Download template and print on letter paper
|
Download files from repo Print settings:
|
Legs
Info about how to fabricate or 3D print the legs
| Fabricated Option | 3D Printed Option |
|---|---|
|
Download template and print on letter paper
|
Download files from repo Print settings:
|
Mounting Brackets for Servos
Info about how to fabricate or 3D print the brackets
General Assembly
Lessons Learned
Servos: the SG90's don't like to operate near their end stops at 0 and 180, so these areas should be avoided for extended periods of operation

